A tour of the interface
What every area of the hammer8 window does — the ribbon, Feature Tree tree, viewport, right rail and status bar.
One picture is most of it — here is the whole window with a small part open:
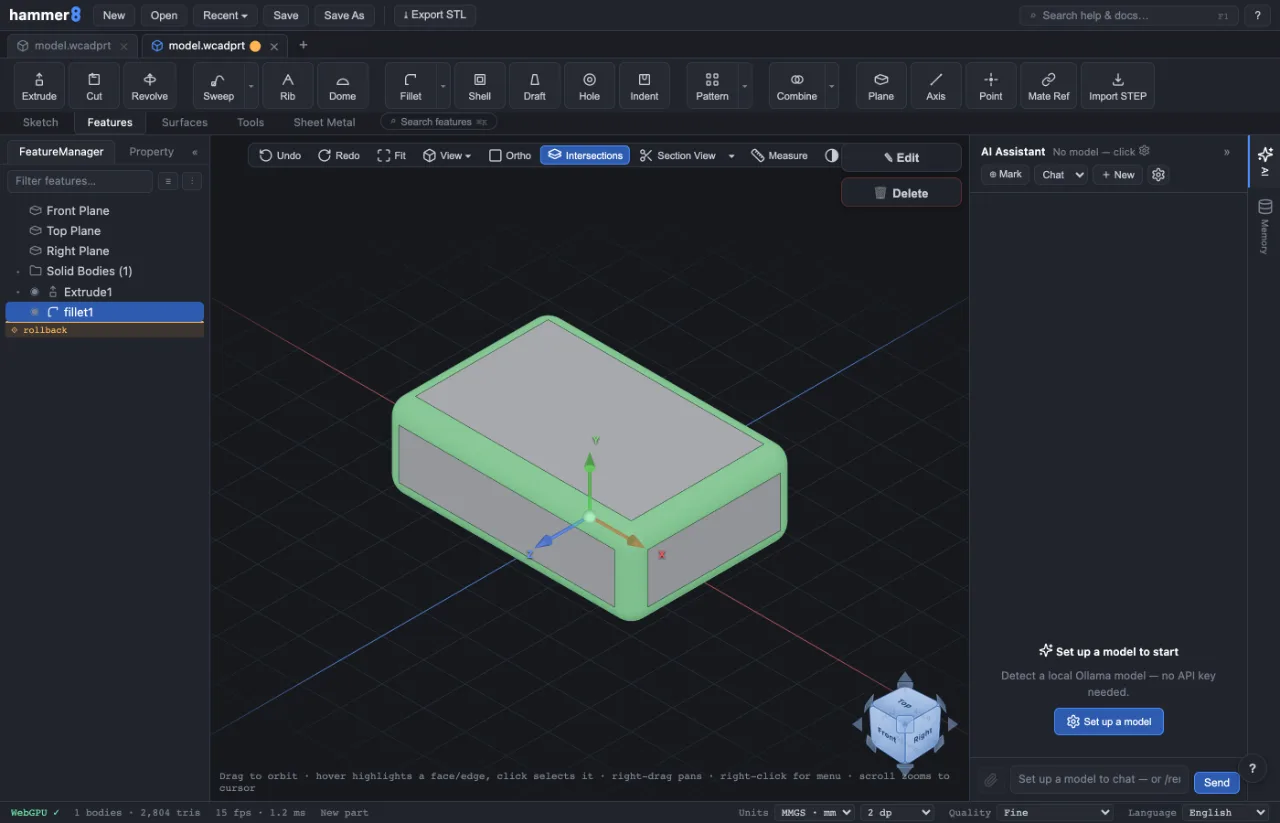
① Top bar — files & documentation
New, Open, Recent, Save and Save As live here, with Import ▾ and Export ▾ covering every other format (Saving, opening & exporting), plus the Search help & docs box on the right — click it (or press F1 anywhere) to open this Help Center. Your work is saved as an .h8prt file.
② Ribbon — the command tabs
Commands are grouped into tabs: Sketch , Features , Surfaces , Tools and Sheet Metal . The ⌕ Search commands chip beside the tabs (or Ctrl/⌘ K) finds any command by name — faster than hunting through tabs.
③ Feature Tree — the history tree
Every feature you create is a row here, in the order it was built. Click to select, double-click to edit, drag to reorder, right-click for suppress/delete. The rollback bar at the bottom replays history up to any point. If a feature fails it shows a warning — see Fix a rebuild error.
④ Viewport — the 3D scene
Orbit with a drag, zoom with the scroll wheel, pan with right-drag (Navigating the 3D view lists the preset schemes). The view cube in the corner snaps to standard views; the toolbar above offers Fit , display modes , Section View and Measure .
⑤ Right rail — AI assistant & properties
The AI Assistant chats about — and can build — your model (Using the AI assistant). When a command is active this rail shows its Property panel form: set options, then ✔ OK commits, ✕ cancels.
⑥ Status bar
Units, decimal places, tessellation quality and the interface language (English / Tiếng Việt).
Related: Your first part (sketch → extrude) · Navigating the 3D view · Keyboard shortcuts · Your data and your privacy